
Visits using route plan
Your scheduled visits for the day are displayed under the ‘Route’ menu. To open, tap on the ‘Route’ in left pane.
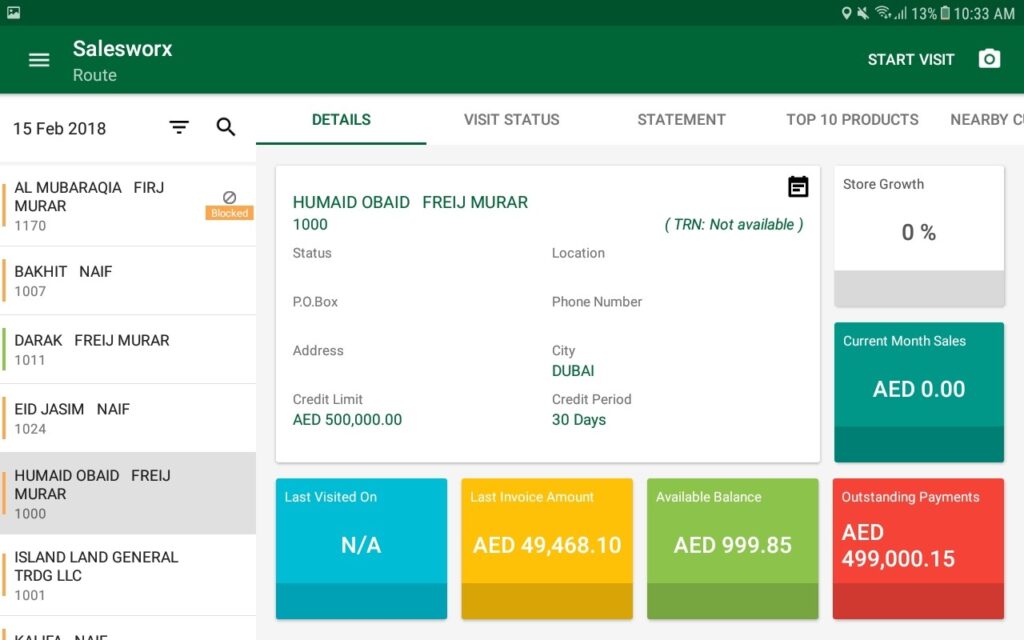
On Tapping on a customer, you can see the customer’s details such as name, address, credit limit, available balance, location, etc.
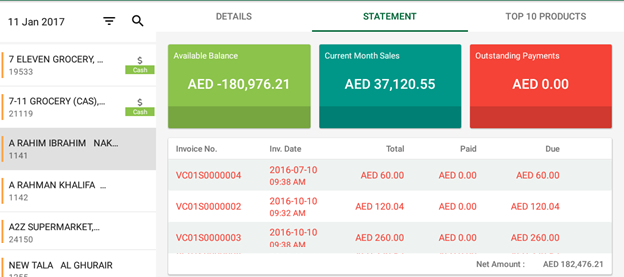
The statement tab will display all the pending dues for the customer.
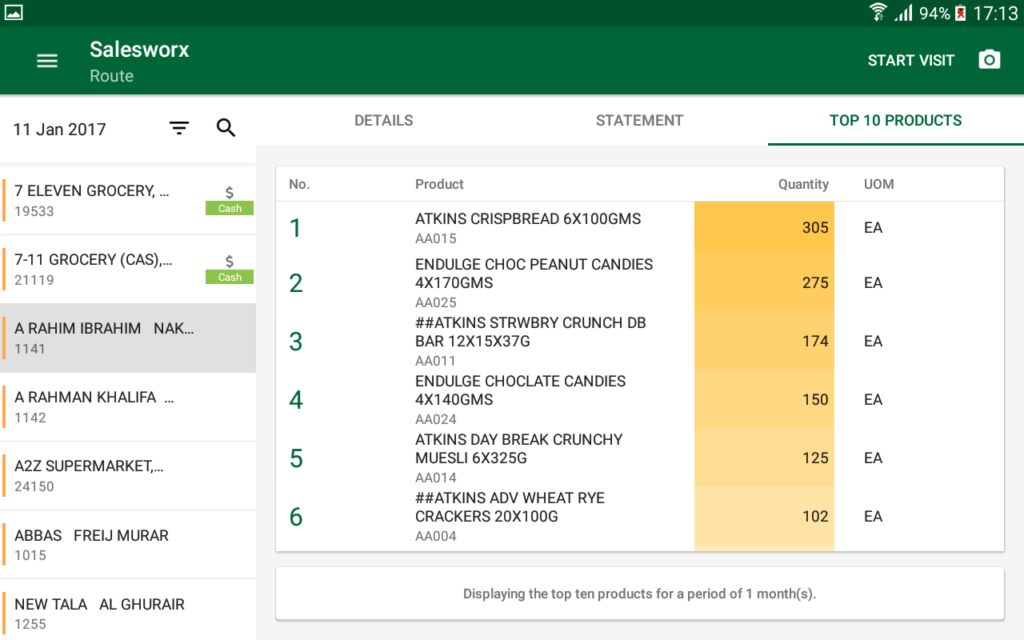
Top 10 products will display the products which are most ordered by the customer. This data is based on the previous orders.
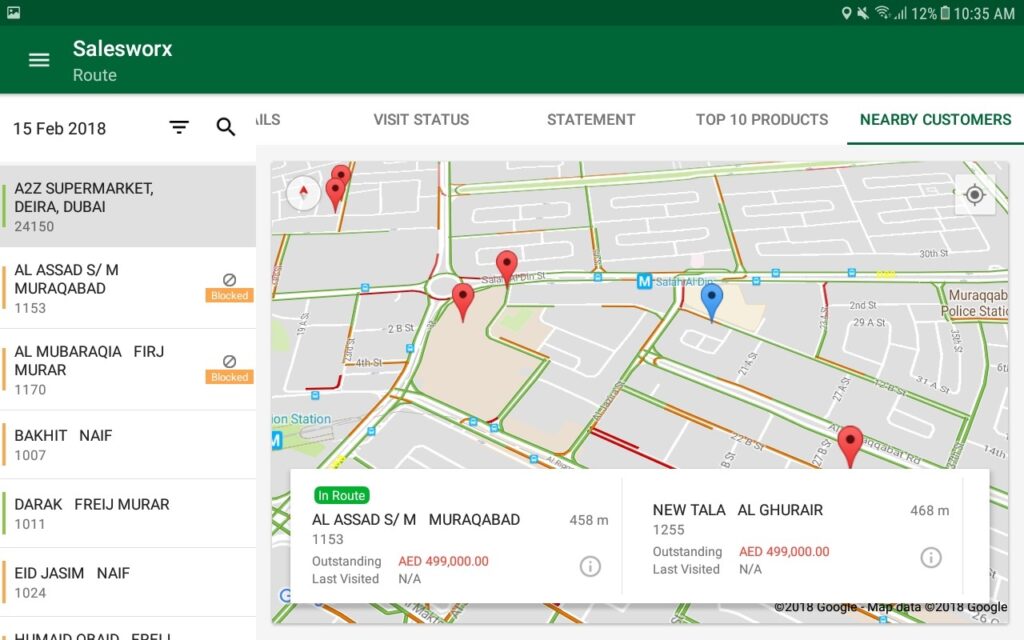
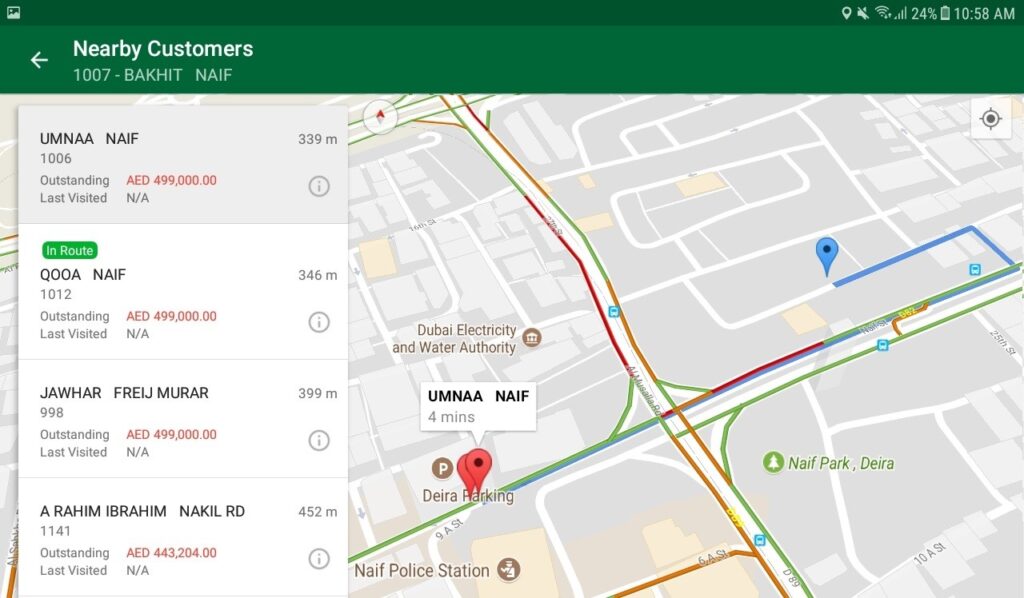
In Nearby Customers tab, you can see the customers which are nearby to the customer you have selected. You can also see the outstanding amount for the nearby customer and the last visited date for that customer.
The color code to the left of the customer name indicates whether the visit to the customer has been completed or not. The orange color indicates that the visit is pending, while green color indicates that the visit has been completed.
To the right of the customer name, if a message ‘Blocked’ is being shown, then the customer is being blocked from taking the orders. ![]()
If a message ‘Cash’ is displayed to the right of the customer name, it indicates that the customer is a cash customer. ![]()
To start a visit, Tap on the START VISIT button on the top right corner.
Once the visit is started you will be presented with this Visit Options page.
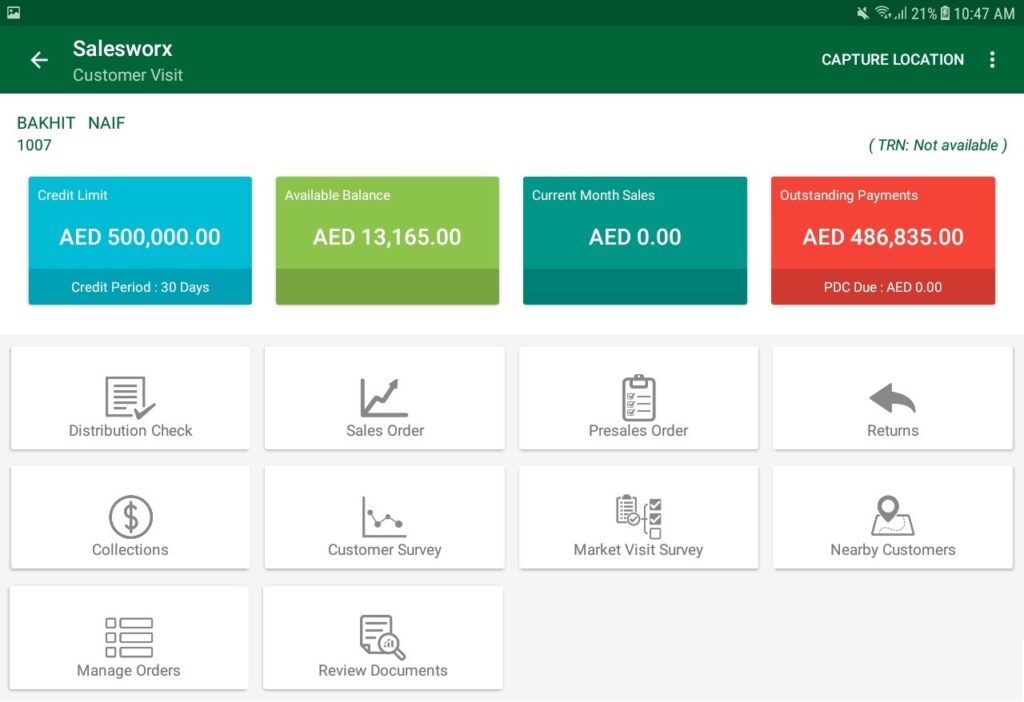
The activities you can perform at the customer location are displayed in this screen.
To perform distribution check, Tap on the button ‘Distribution Check’.
To create a sales order, Tap on ‘Sales Order’.
To accept returns and issue credit notes, Tap on ‘Returns’.
To accept payment for current or previous sales order, Tap on ‘Collections’.
To perform a survey, Tap on ‘Customer Survey’.
Tap on Manage Orders to manage invoices and proforma orders.
You can use reprint option to reprint invoice or credit notes.
A detailed information on the above modules are provided in following chapters.
Distribution Check
Distribution check is done to track whether the products in the MSL is available with the customer or not. If it is available, the quantity and the nearest expiry date can be recorded. If a product is not available, you can toggle Availability button by tapping on it or sliding it.
The Entry and Exit denotes the outcomes of the previous visit. If a product was marked available on the previous visit, the ‘Entry’ will be green in color. If a product was ordered during the previous visit, the ‘Exit’ will be green in color.
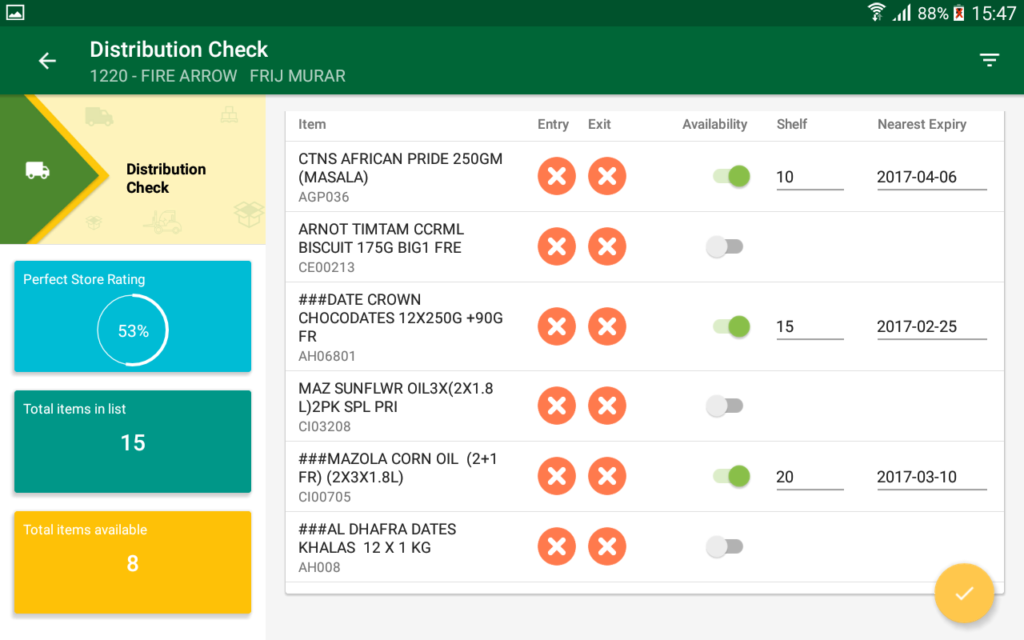
You can use the filter button to narrow down the products list.
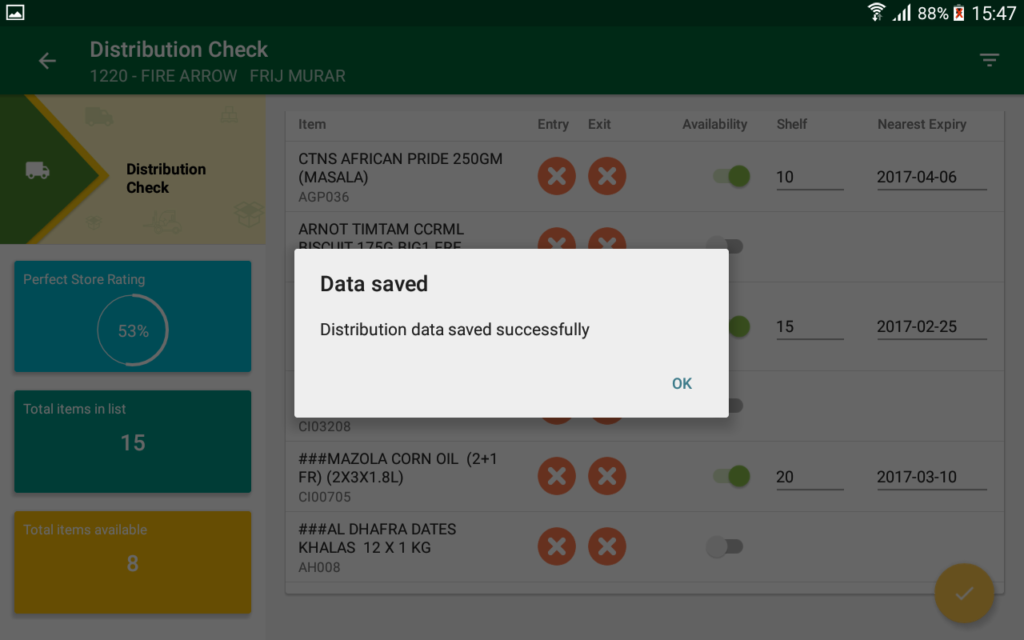
Tap on the tick mark on the bottom right of the screen to save the distribution check data.
You will get an acknowledgment. Tap OK to continue.
Sales Order
In this screen you can create sales order for the customers, generate invoices, and print them.
To create a sales order, Tap on ‘Sales Order’ in Visit Options.
The following screen will be displayed.
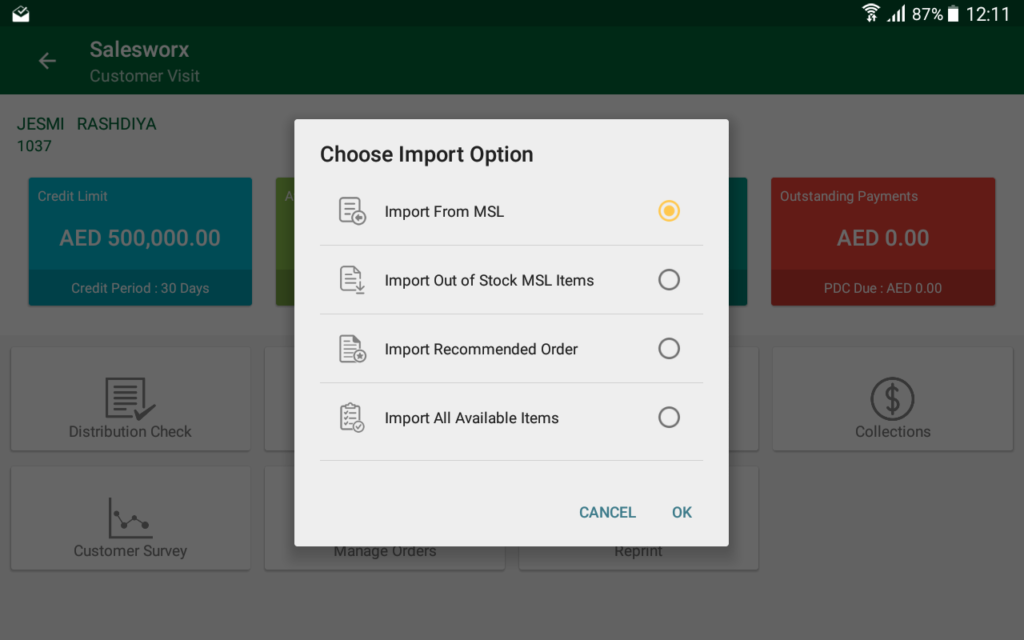
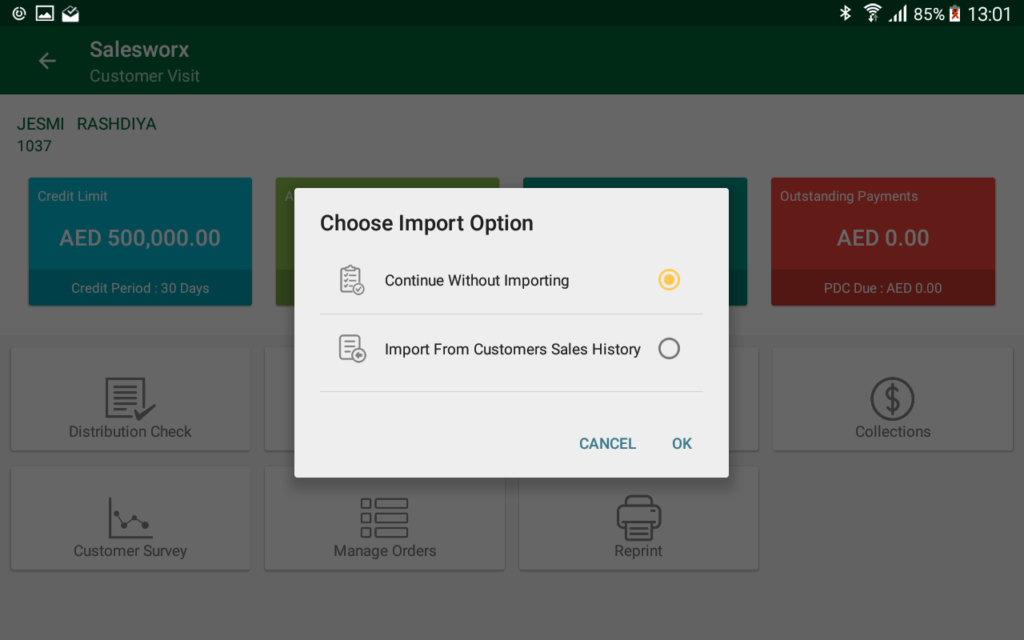
You will have to choose an import option. The products can be imported from MSL, the ones which are out of stock among MSL, recommended ones based on the previous order history, or all the available items in the van.
The product list will be loaded. You can narrow down the list by filtering or searching. Enter the Order quantity and the unit of measurement. The van stock will be displayed, enter the quantity accordingly.
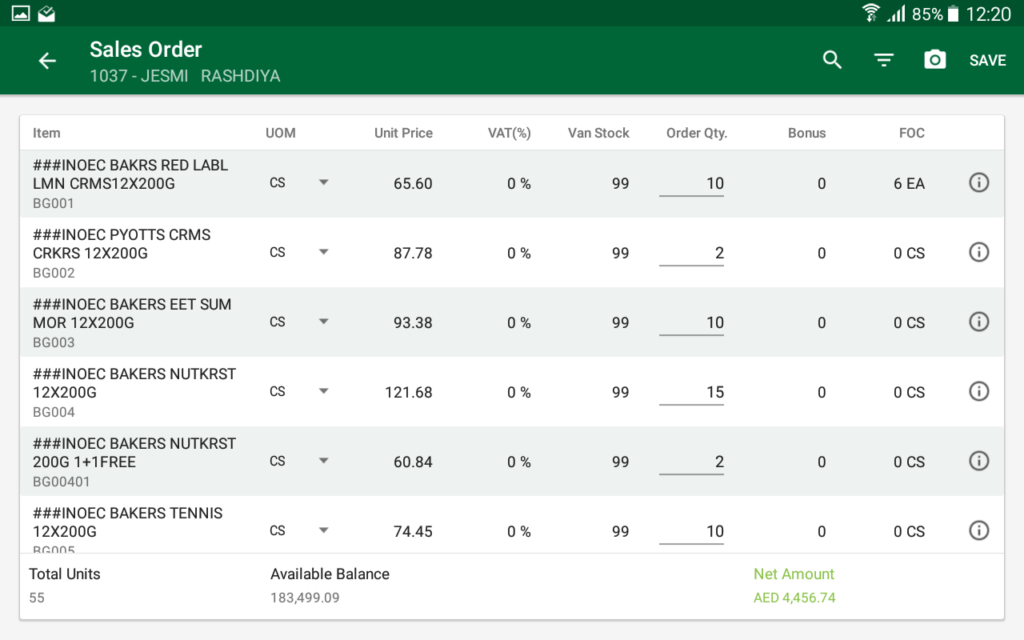
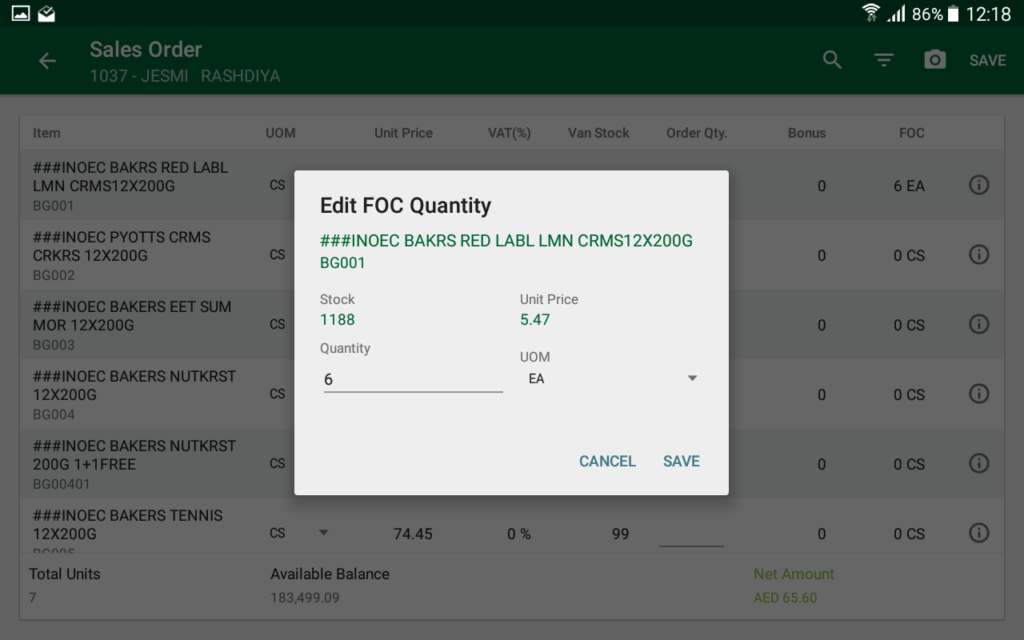
Tap on the FOC and enter the Quantity and UOM of the products which will be given as free of charge.
The total units, available balance, and net amount of the current order will be displayed at the bottom of the page.
After all the required products are added, tap on SAVE.
Sales order confirmation with all products and the quantity you entered will be displayed.

Tap on ![]() button on bottom right of the screen to confirm the order.
button on bottom right of the screen to confirm the order.
A confirmation screen will be displayed. Enter the customer reference number, if any. Enter the name, comments if any, and the signature of the customer.
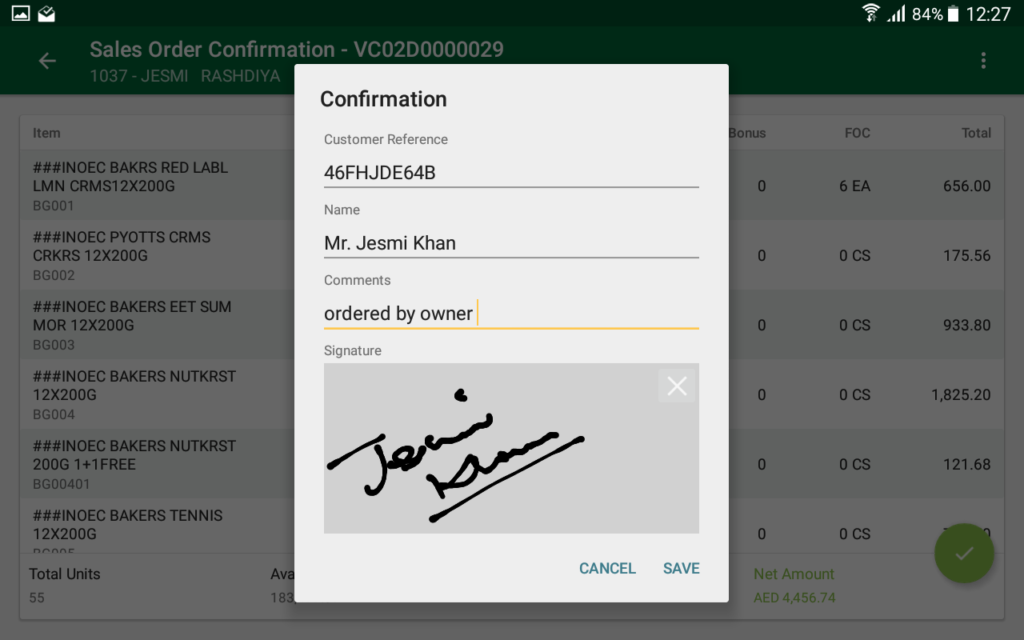
Tap on SAVE to confirm the order.
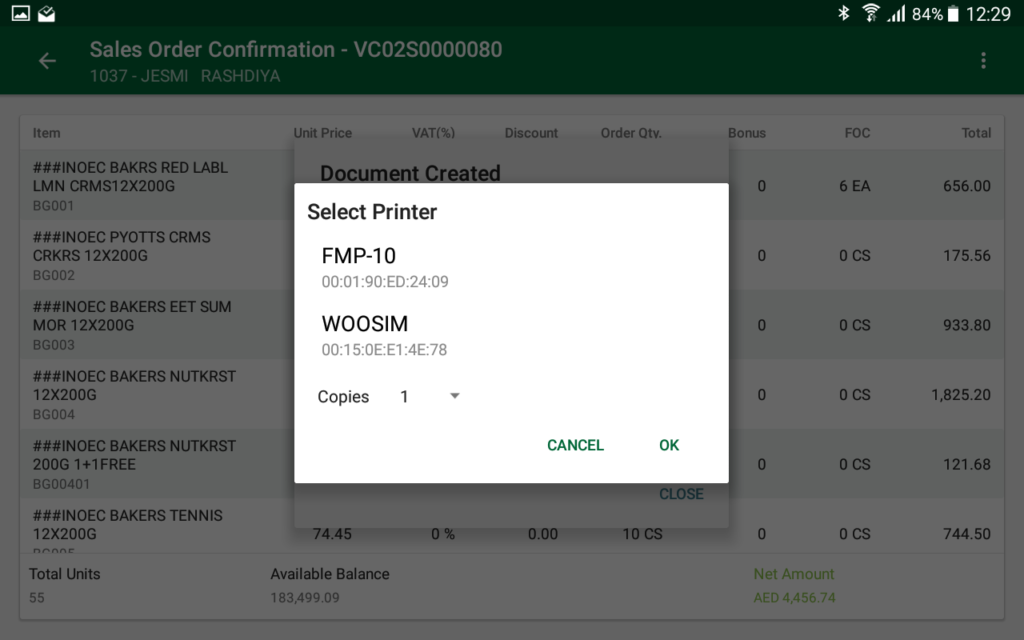
You will get a confirmation ‘Document Created’.
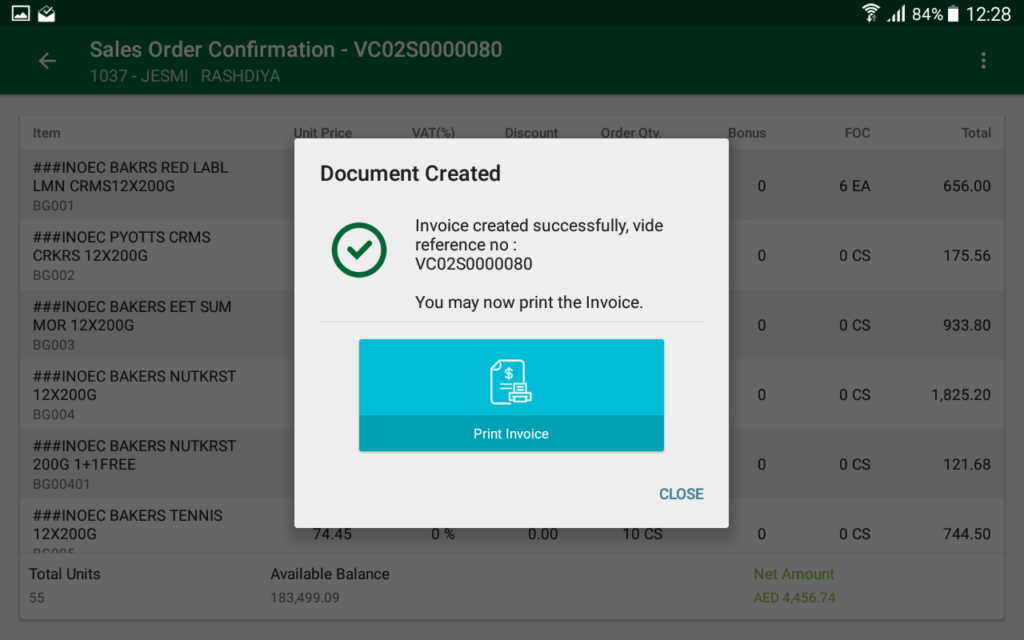
Tap on ‘Print Invoice’ to print the invoice.
Choose the printer and tap OK to print.
An order which is not confirmed will be saved as a proforma order. You can confirm this order at a later stage. The proforma order will be displayed in ‘Manage Orders’ section.
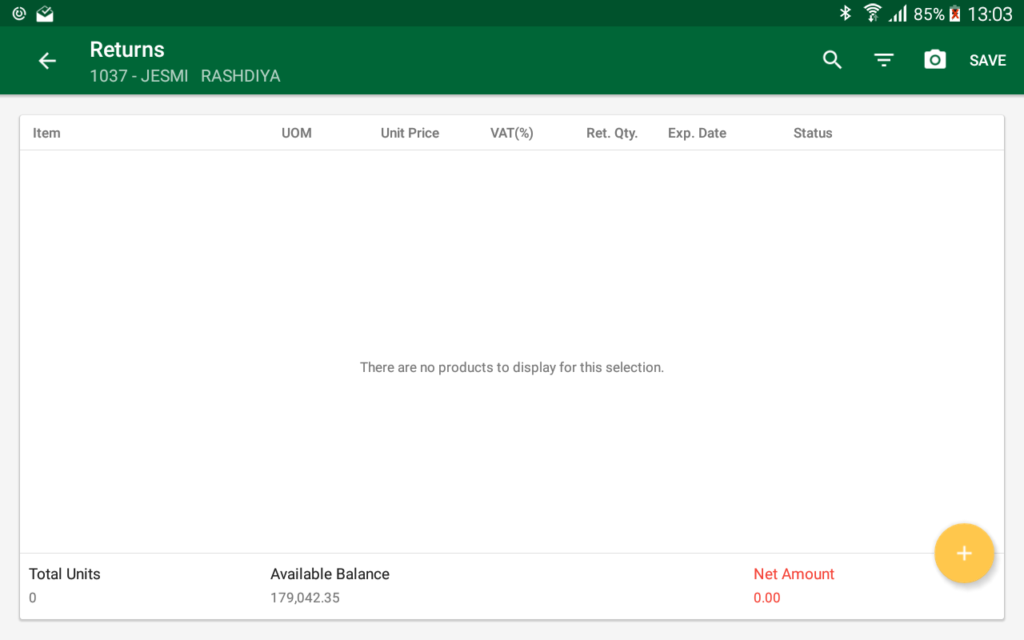
Returns
You can accept the return of items in this module. To open returns, tap on ‘Returns’ tile. You will be asked for an import option. You can continue without importing, or you can import from customer’s sales history.
Tap on ‘+’ button to add products.
A list of products will be loaded. Tap on the checkbox against the product name in order to select those products.
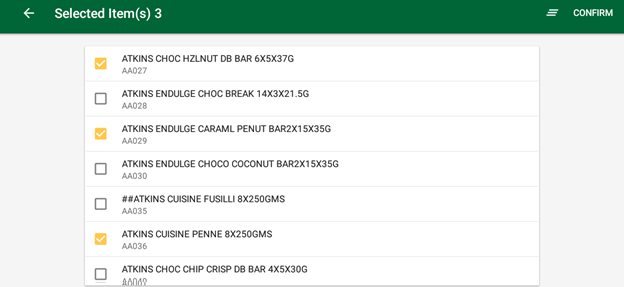
Then tap on CONFIRM.
The selected products will be displayed.

Select unit of measurement, returning quantity, Expiry date, and status.
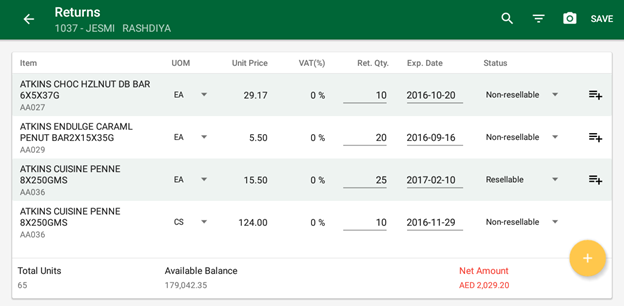
If the status is set to resellable, the returned product will be added to the van stock.
If there are same product which fall into different status or expiry date, you can tap on ![]() button and enter the details separately.
button and enter the details separately.
Once the details are entered, tap on SAVE.
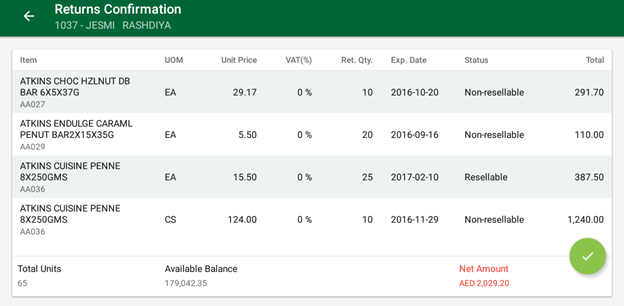
Returns confirmation page will be displayed. Tap on ![]() button to confirm.
button to confirm.
Enter customer reference number, name, comments if any, and signature.
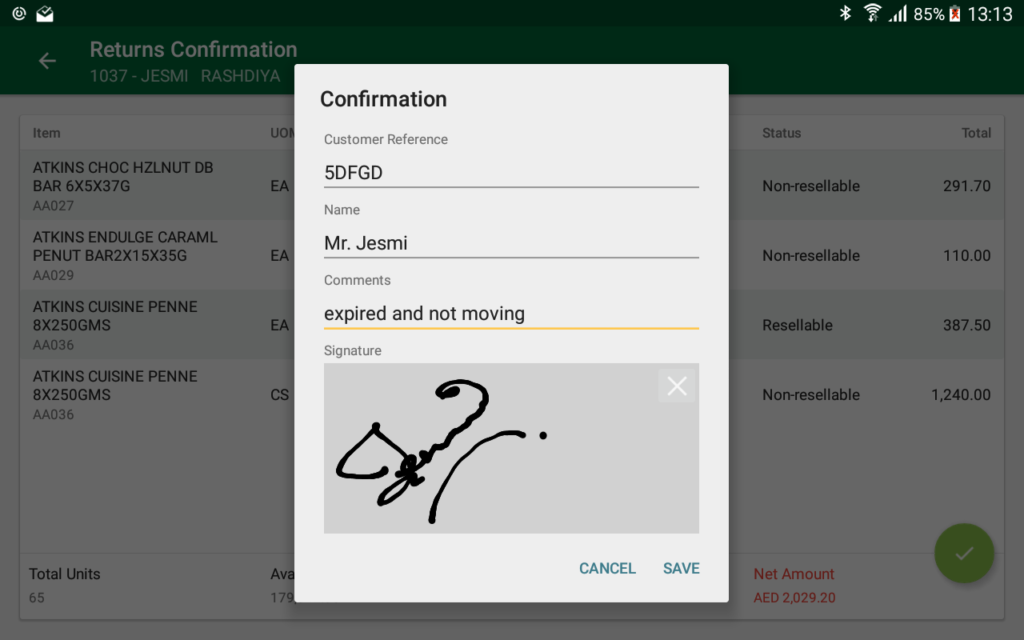
Tap SAVE to confirm.
You will get a confirmation ‘Document Created’.
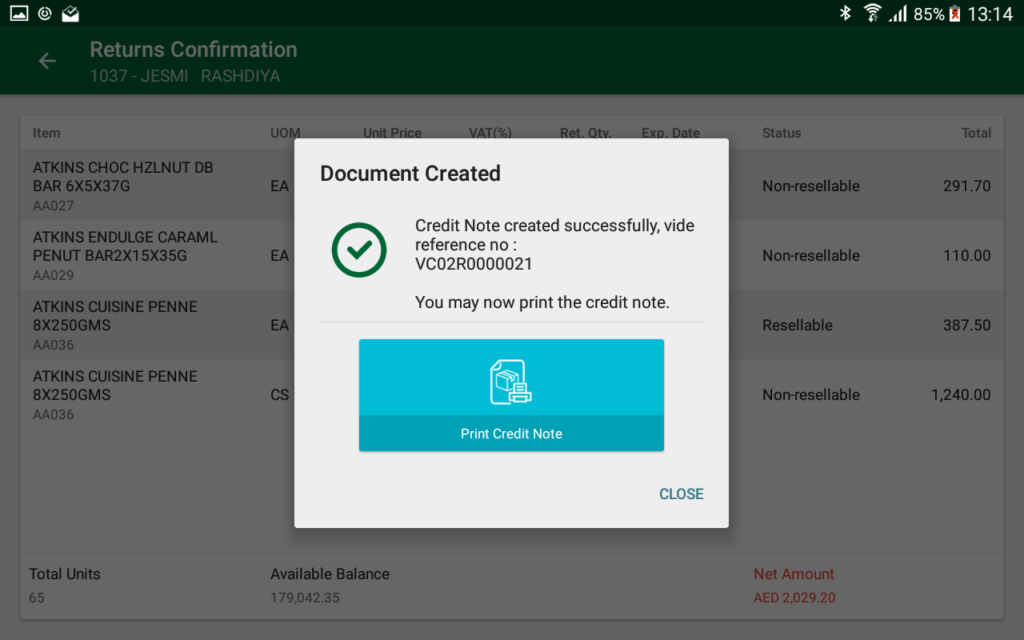
You can print the credit note by tapping on ‘Print Credit Note’.
Select the printer and tap OK to print.
Collections
You can accept the collections in this module and assign it against the previous invoices. The collection can be made in cash, current cheque, or post-dated cheque.
Tap on the ‘Collections’ tile in Visit Options to open collections module.
Tapping on the ‘i’ button on top right corner will show you the customer statement.
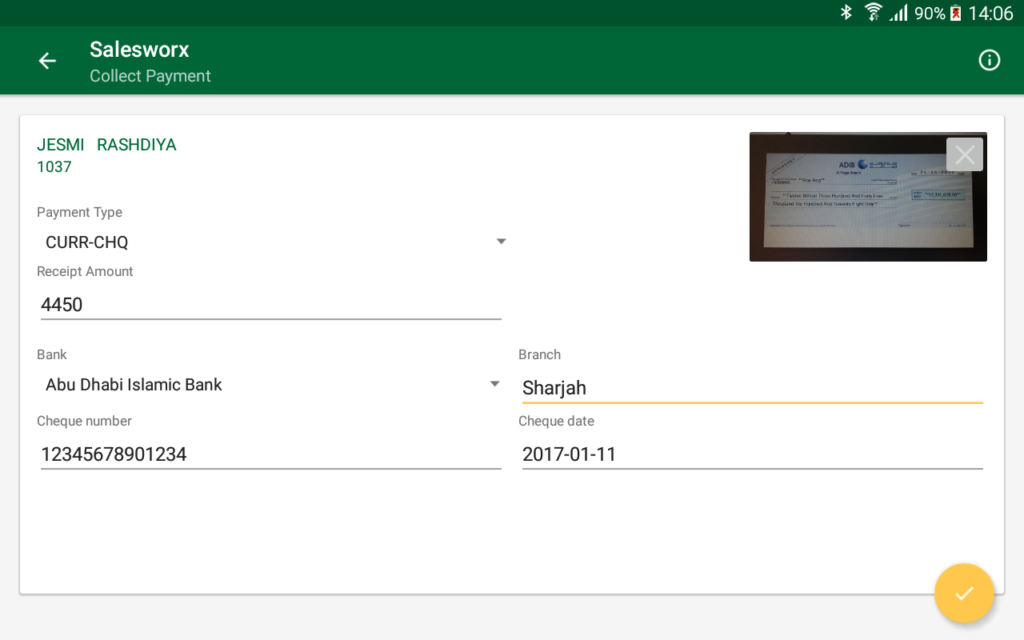
Choose the Payment Type. If the payment type is Current Cheque or Post-dated Cheque, enter the amount, bank name, branch, Cheque number, and cheque date.
Tap on the camera button to capture an image of the cheque.
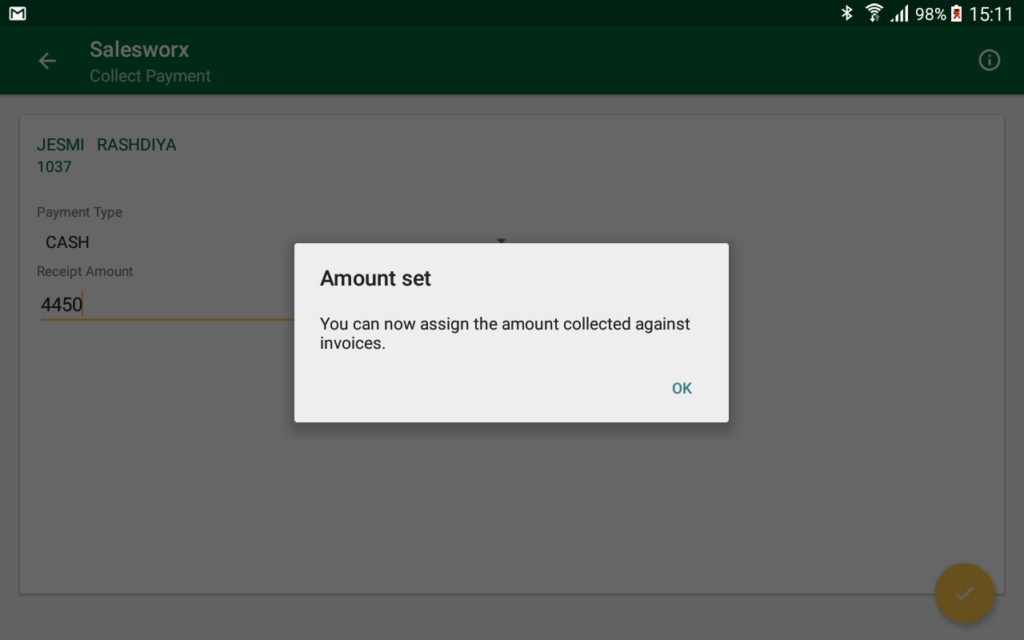
If the payment type is Cash, you need to enter only the amount. Once the details are entered, tap on tick button on the bottom right corner.
You will get a message saying “Amount set. You can now assign the amount collected against invoices.” Tap OK to continue.
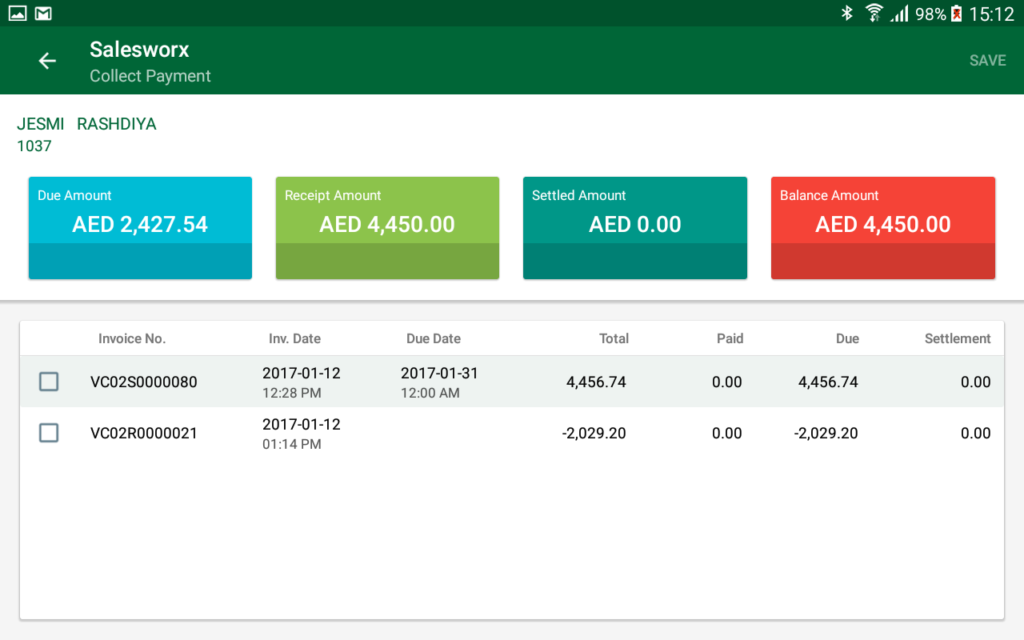
The open invoices will be listed. Tap on the invoice and you can see a pop up where in you can enter the amount that is to be deducted from due amount.
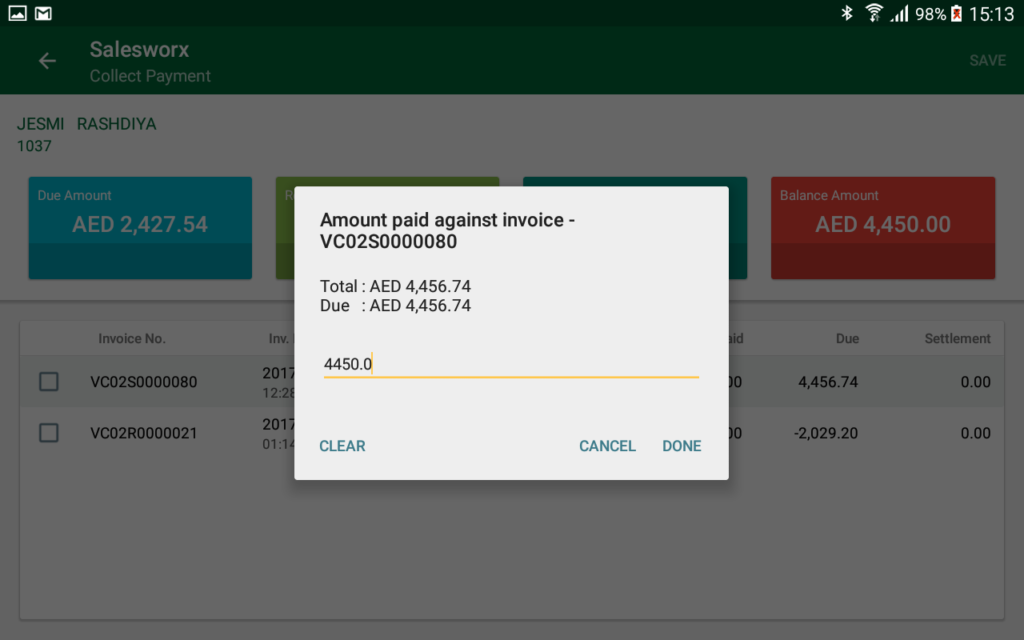
Enter the amount and tap on DONE.
After all the collection amount are allocated, tap on SAVE.
You will get a confirmation message ‘Document Created’.
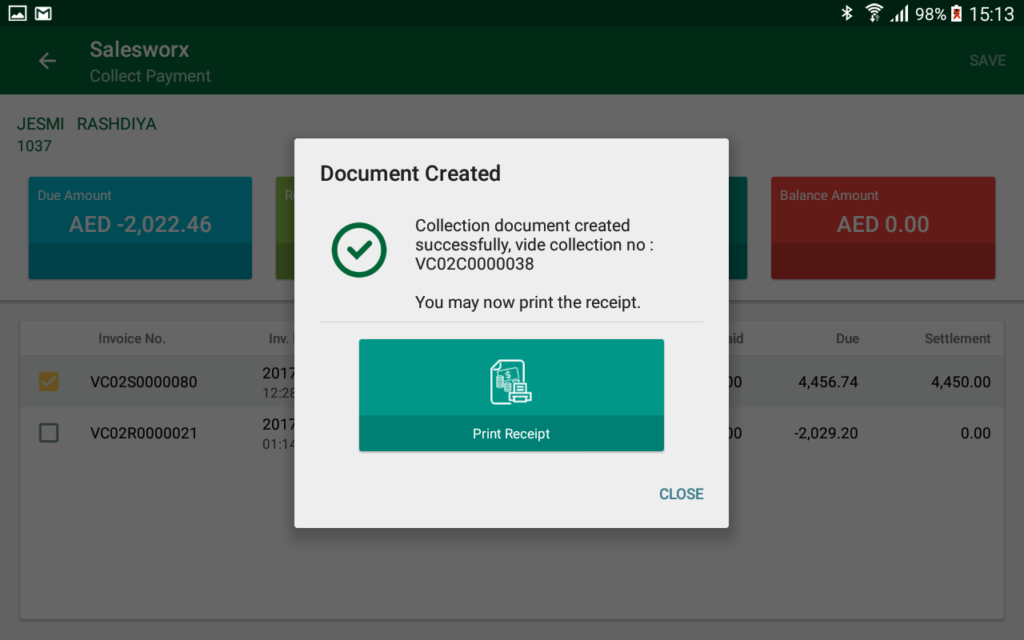
You can print the receipt by tapping on ‘Print Receipt’.
Customer Survey
You can conduct surveys which are assigned to you in the BackOffice. To perform a survey, Tap on ‘Customer Survey’ tile in the visit options.
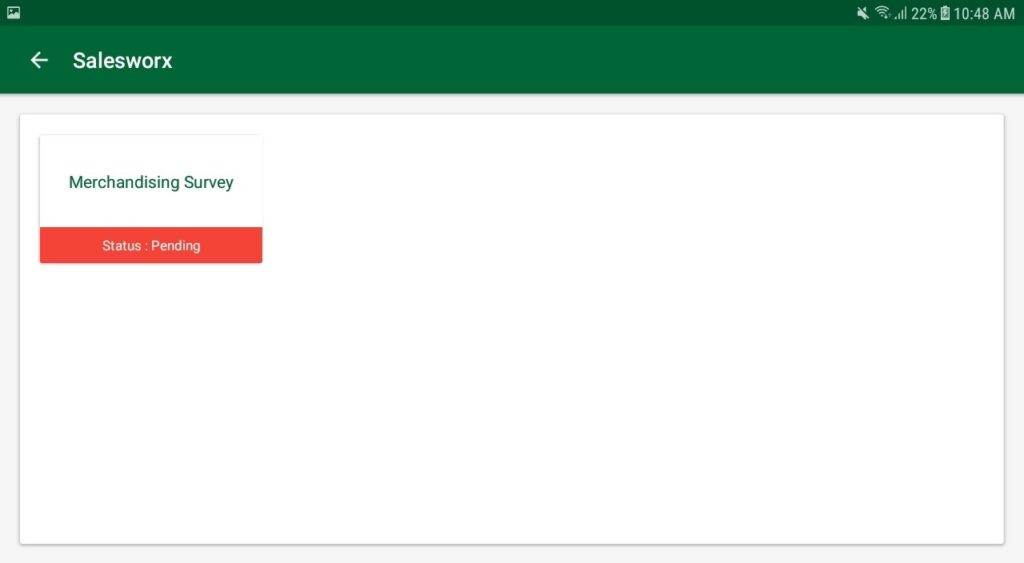
You can see all the active surveys assigned to you. The status of the survey will indicate whether the survey is competed for the customer or not.
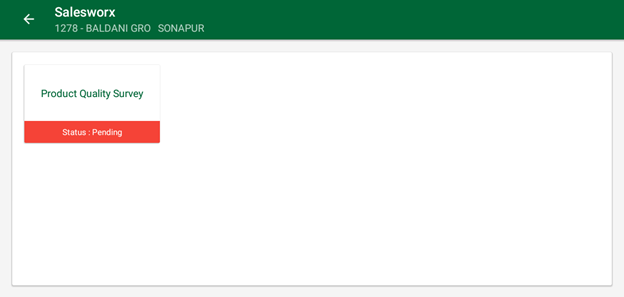
Tap on a survey to open it.
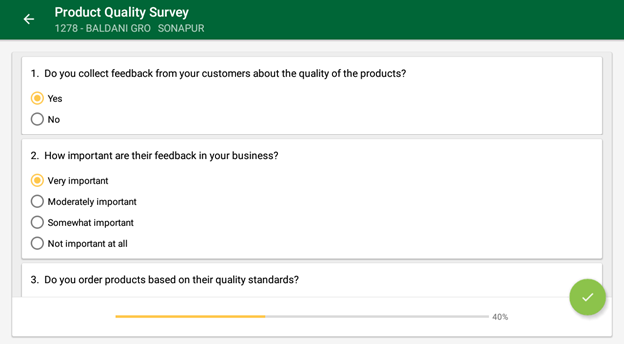
Mark the responses for each query. The progress bar on the bottom of page will show the percentage of survey completed.
Tap on ![]() once you have completed answering every question.
once you have completed answering every question.
You will get a notification ‘Survey Completed’ and the status of the survey will be changed.
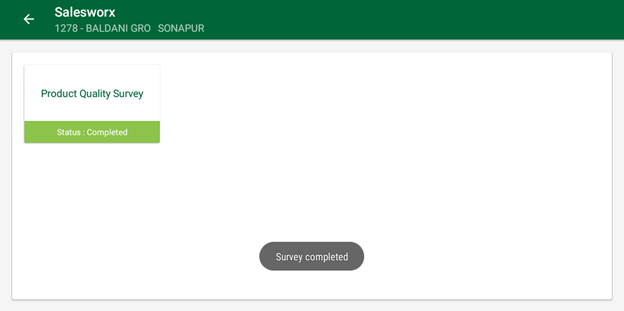
Repeat the process if there are more than one active surveys.
Market Visit Survey
Tap on Market Visit Survey tile to perform the market visit surveys configured for you.
All the active surveys will be displayed.
Tap on a survey to open it.
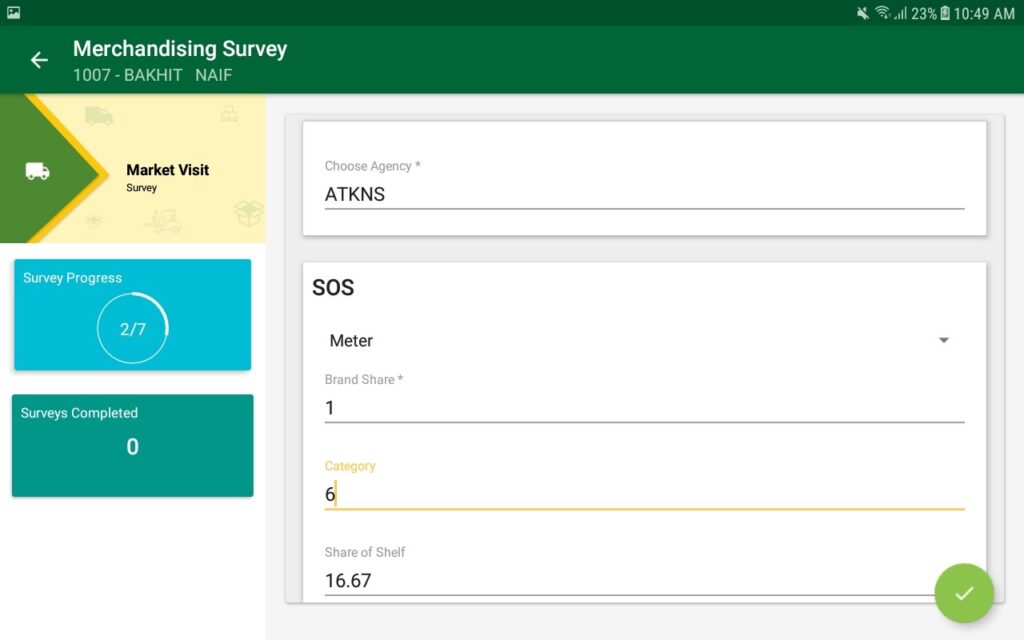
Record your responses against the survey questions.
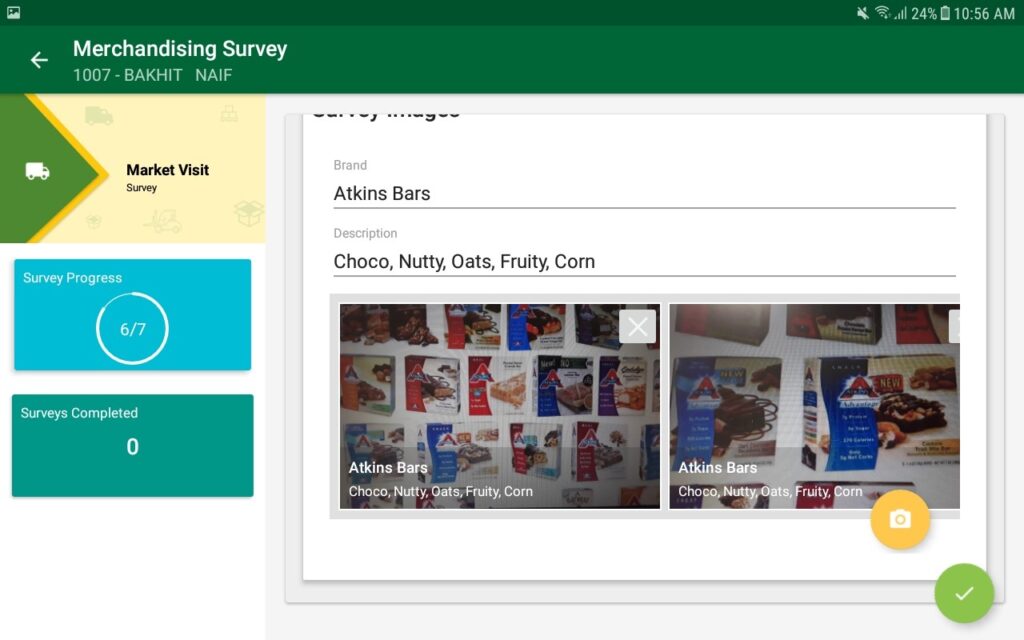
Tap on ![]() to save the survey.
to save the survey.

The survey will be saved and you can perform another survey now.
Nearby Customers
In Nearby customers screen, you can see other customers within the same vicinity of visiting customer. You can see the outstanding amount of the customer. You can also see whether that customer is included in today’s route or not.
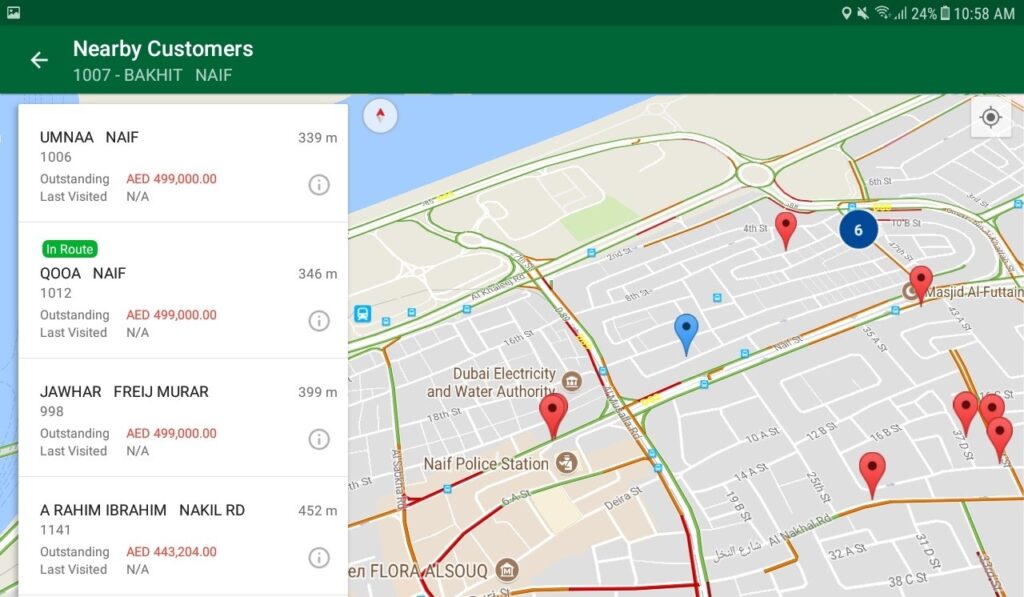
Tap on a customer to view the route to highlighted customer.
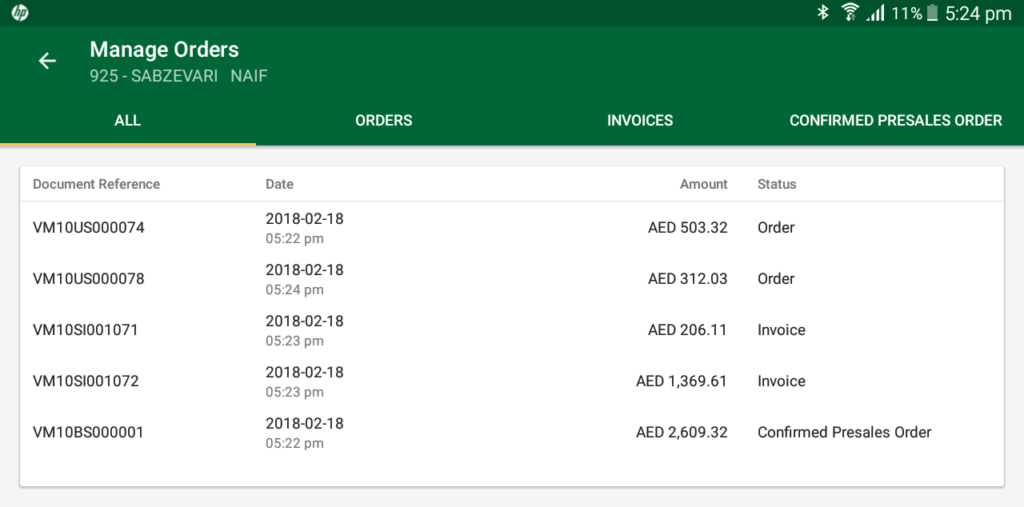
Manage Orders
Under Manage Orders, you can see the invoices generated, presales orders, and proforma orders. To open, tap on ‘Manage Orders’ tile in visit options.
Manage Orders has three tabs; All, Orders, Invoices, and ‘Confirmed Presales Order’.
‘All’ tab will display both the proforma orders and invoices. ‘Orders’ will display proforma orders and ‘Invoices’ will display invoices. Presales orders will be displayed in ‘Confirmed Presales order’ tab.
You can modify a proforma order or delete it. Tap on an order and it will display you options to Modify and Delete.
To confirm a proforma order and generate an invoice, tap on the proforma order. Then tap on Modify.
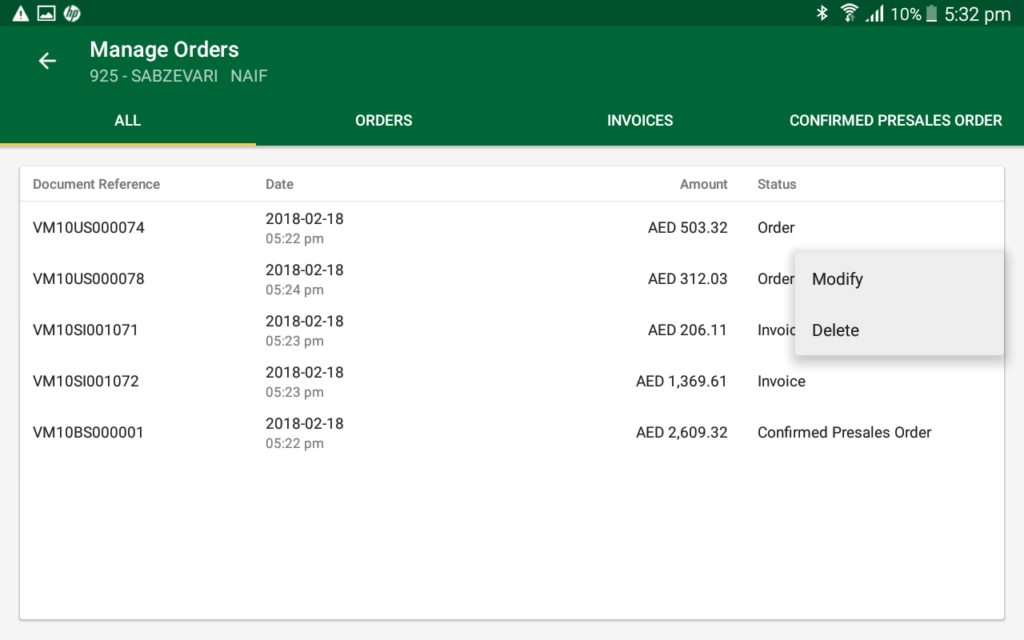
Tap on SAVE and continue the same process you did on ‘Sales Order’.
Review Documents
The Review Documents screen will allow you to review the documents such as invoices, collection receipts, and credit notes, and allows you to reprint them.
To open, Tap on ‘Review Documents’ tile on the visit options.
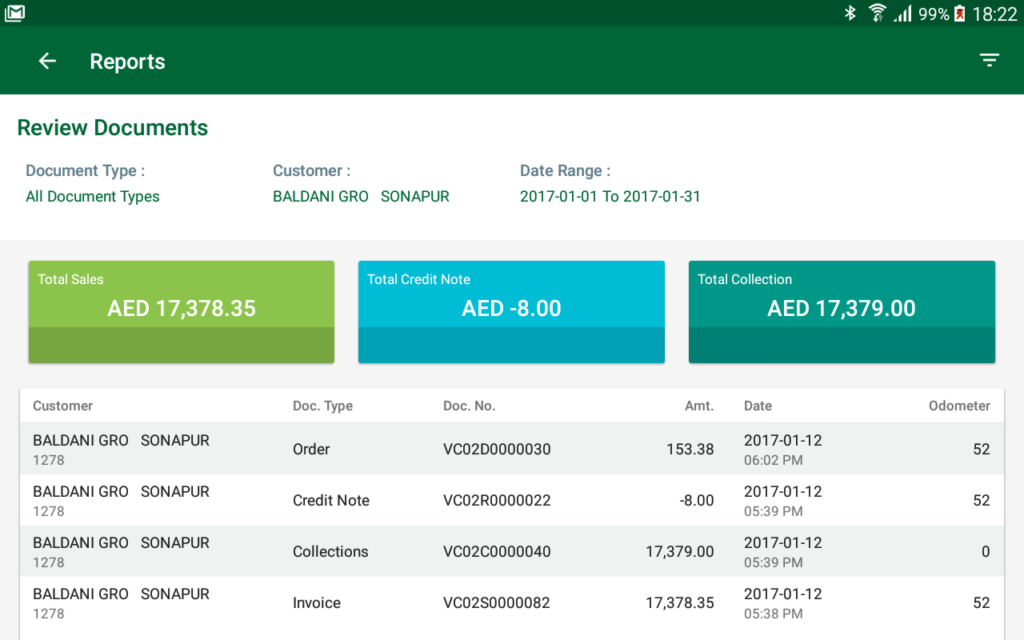
Choose the document you wish to review.
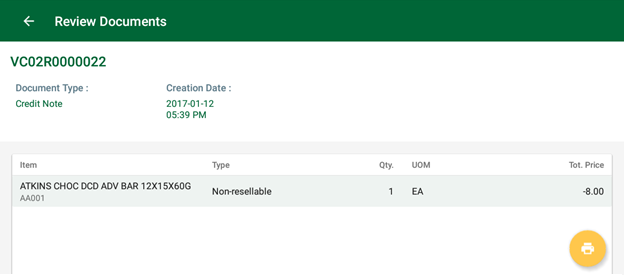
Tap on Print button to print.
Closing a visit
To close a visit, Tap on the Back button available on top left corner in the visit options screen.
It will ask for confirmation. Tap OK to proceed.
